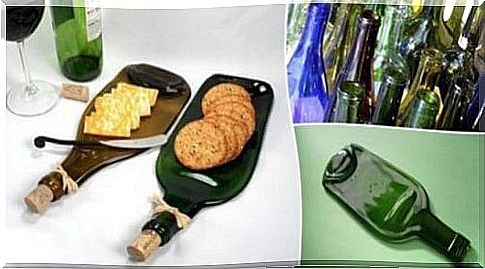
How To Turn A Bottle Into A Snack Tray
Nowadays, stopping pollution is very important, which is why we must not miss any opportunity to recycle. For this reason, in the article on azites we invite you to discover how you can turn an ordinary bottle into a snack tray. Read on and remember!
Glass is used to make glasses, windows, various containers and many other objects that we use daily. This material is popular not only because it is very practical, but also because it is 100% reusable.
Unlike other recyclable materials, glass can be completely reused because it remains unchanged during the manufacturing process. Basically, for every ounce of recycled glass, you get an equal amount of material in perfect condition.
Steps to turn a bottle into a snack tray
The next method of making a snack tray with a bottle is very simple, but you will need time and a little patience. The object you will get will be very interesting and you will be able to decorate it in different ways so that you can use it at parties.
The necessary materials
- An empty bottle
- Soap or natural detergent
- Microwave
- Wire sponge
- Wire and pliers
- Wax paper or ceramic fiber paper
Step 1
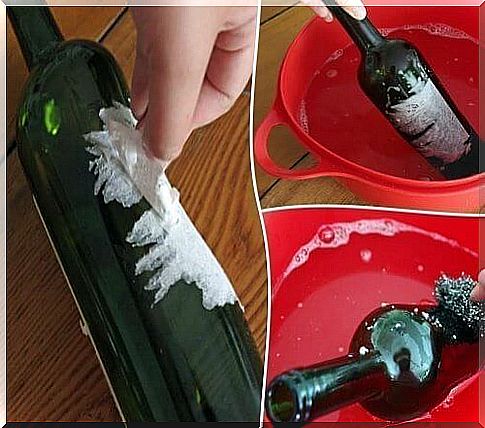
First, you will need to clean the glass well. Remove any labels so that the resulting snack tray has a uniform color. (Some people still prefer to leave the labels intact.)
If you can remove the label by hand, that’s fine. Otherwise, we advise you to fill a bowl with warm water and detergent. This mixture will help you soften the glue and remove the label more easily with a wire sponge. But be careful not to be too aggressive so as not to scratch the bottle.
Step 2
Rinse the bottle both inside and out with plenty of cold water to remove any residue and odors. Allow the bottle to dry completely.
Step 3
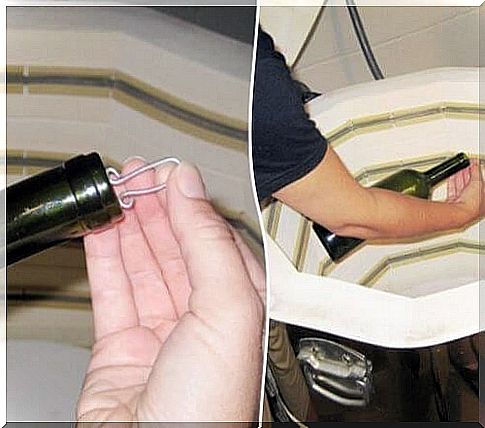
One option is to use wire and tongs to make a hook for your future snack tray. This step should only be followed if you want to hang the hanger tray in the kitchen. Bend the wire and insert it into the neck of the bottle so that it is firm and flat.
Step 4
The next step involves flattening the glass and requiring a lot of attention. Place the ceramic fiber paper or waxed paper on a baking paper. Place the bottle horizontally on the paper.
Then turn on the oven and bake the bottle for an hour. After this time, increase the temperature so that the oven produces about half the heat it is capable of and let the glass bake for another 20 minutes.
Then raise the temperature to maximum (650-800 ° C), let it cook for another half hour and turn off the heat. Do not open the oven yet, but leave the bottle there for 24 hours.
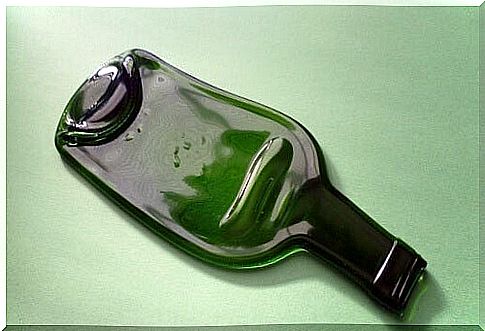
Step 5
After the 24 hours have elapsed, the bottle will be completely cooled and you will be able to take it out of the oven. Now you can use it as a snack tray.
Step 6
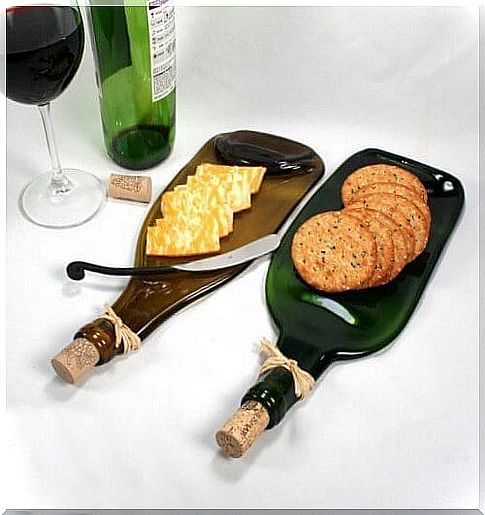
Unleash your creativity and decorate your new snack tray the way you want. You can use ribbons or paints to personalize it. If you want a more elegant snack tray, put a stopper on top and wrap the bottle with a ribbon.
Minimalist designs are ideal if you want a snack tray suitable for weddings, birthdays or family reunions. Of course, you will also need various snacks: cookies, biscuits, bread, etc.
Don’t hesitate to make your own snack tray!
As you can see, it is not at all difficult to make your own snack tray. Bottle recycling is simple and can be done at home. Making these objects is fun and allows you to practice your skill and imagination.
The most important advantage of this hobby is that it allows you to protect the environment. Although it does not seem to be a significant action, you will help reduce the negative impact of using glass products.